
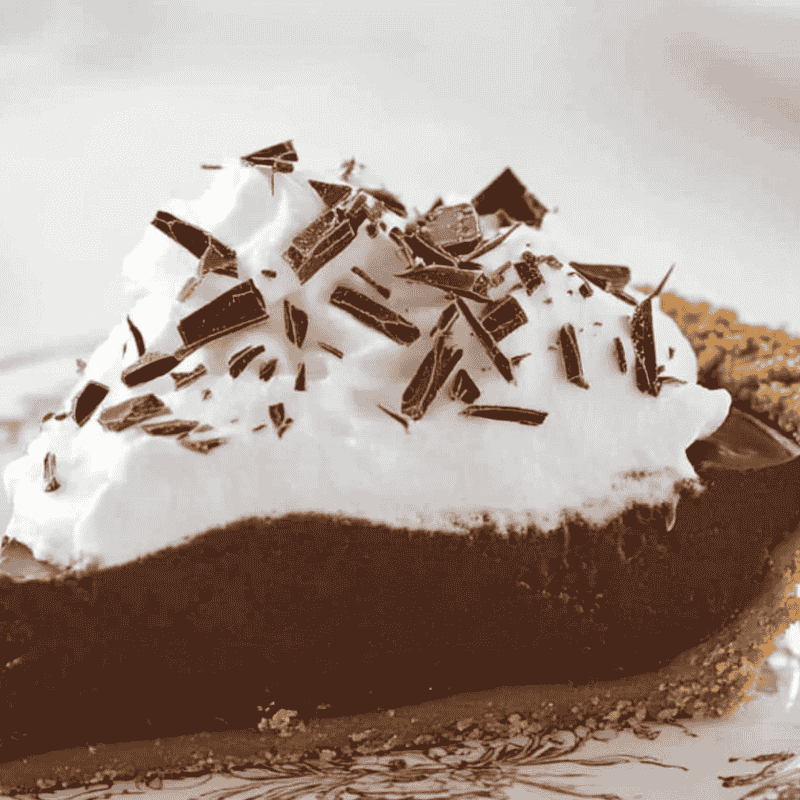
Easy No-Bake Chocolate Pudding Pie is a creamy, dreamy dessert that takes minimal effort yet delivers maximum satisfaction. With its rich chocolate filling, buttery crust, and fluffy whipped topping, it’s a no-fuss recipe perfect for any occasion. Whether you’re hosting a dinner party or craving a quick homemade treat, this pie is guaranteed to impress without ever turning on the oven.
What Is Easy No-Bake Chocolate Pudding Pie?
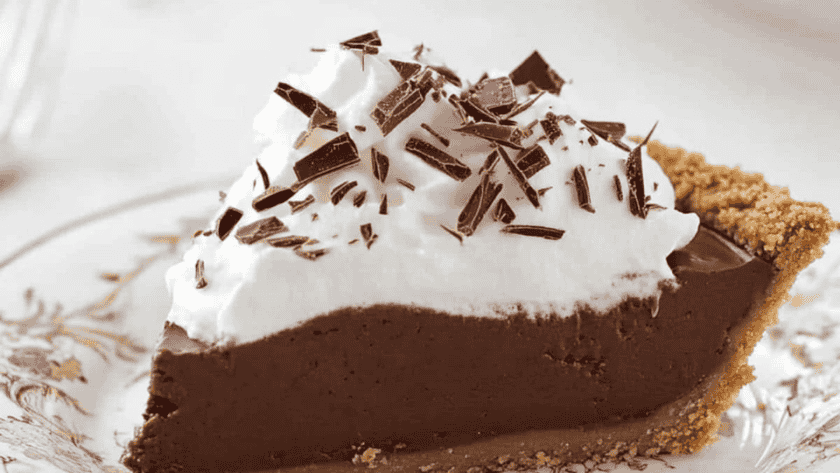
Easy No-Bake Chocolate Pudding Pie is a chilled dessert made from instant chocolate pudding combined with milk and whipped topping, poured into a pre-made graham cracker or Oreo crust. The pie is then chilled until set, resulting in a smooth, silky texture that melts in your mouth. It’s simple, quick, and irresistibly delicious — the perfect dessert for chocolate lovers.
Reasons to Try Easy No-Bake Chocolate Pudding Pie
- No Baking Required – Ready in minutes, no oven needed.
- Rich and Creamy Texture – Smooth chocolate pudding filling that’s incredibly indulgent.
- Perfect for Any Occasion – Great for holidays, parties, or weeknight desserts.
- Make-Ahead Friendly – Can be prepared ahead and chilled until ready to serve.
- Customizable – Easily adapted with different toppings or crusts.
- Crowd-Pleasing – A classic chocolate dessert everyone will love.
Ingredients Needed to Make Easy No-Bake Chocolate Pudding Pie
- 1 pre-made 9-inch graham cracker or Oreo pie crust
- 2 boxes (3.9 oz each) instant chocolate pudding mix
- 3 cups cold milk
- 1 cup whipped topping (such as Cool Whip), plus more for garnish
- ½ cup semi-sweet chocolate chips (optional for extra richness)
- Chocolate shavings or cocoa powder (for topping)
Instructions to Prepare Easy No-Bake Chocolate Pudding Pie
- Prepare the filling – In a large bowl, whisk together the chocolate pudding mix and cold milk for about 2 minutes until thickened.
- Add whipped topping – Gently fold in 1 cup of whipped topping until smooth and creamy. If using chocolate chips, stir them in at this stage.
- Fill the crust – Pour the chocolate pudding mixture into the pre-made pie crust and spread evenly with a spatula.
- Chill the pie – Cover with plastic wrap and refrigerate for at least 3–4 hours or until fully set.
- Add topping – Before serving, spread an extra layer of whipped topping over the pie and garnish with chocolate shavings or a dusting of cocoa powder.
- Slice and serve – Use a sharp knife to cut clean slices and enjoy chilled.
What Goes Well With Easy No-Bake Chocolate Pudding Pie
- Fresh Berries – Strawberries or raspberries add a burst of freshness.
- Vanilla Ice Cream – Complements the chocolate flavor beautifully.
- Coffee or Espresso – Enhances the rich cocoa taste.
- Caramel Drizzle – Adds a sweet, buttery contrast.
- Mint Leaves – Perfect for a refreshing, elegant touch.
Key Tips for Making Easy No-Bake Chocolate Pudding Pie
- Use cold milk – Ensures the pudding thickens quickly and properly.
- Don’t overmix – Over-whisking can cause the pudding to lose its structure.
- Chill thoroughly – Allow at least 3 hours for the pie to firm up completely.
- Add texture – Mix in chocolate chips, nuts, or crushed cookies for variety.
- Use quality pudding – The better the pudding mix, the richer the flavor.
- Customize the crust – Swap graham crackers for Oreo or digestive biscuits for different tastes.
- Serve cold – Keeps the texture creamy and refreshing.
Creative Variations of Easy No-Bake Chocolate Pudding Pie
- Peanut Butter Chocolate Pie – Add ½ cup peanut butter to the pudding mixture for a nutty twist.
- Mint Chocolate Pie – Stir in a few drops of mint extract and top with crushed peppermint candies.
- Mocha Pie – Replace ½ cup of milk with cooled coffee for a subtle coffee flavor.
- S’mores Pie – Add mini marshmallows and drizzle with chocolate syrup before chilling.
- Triple Chocolate Delight – Use Oreo crust, chocolate pudding, and top with chocolate ganache.
- Banana Chocolate Pie – Layer sliced bananas between the crust and pudding filling.
Storage Guidelines for Easy No-Bake Chocolate Pudding Pie
- Refrigeration – Store covered in the refrigerator for up to 4 days.
- Freezing – Freeze for up to 2 months for a frozen dessert version; thaw slightly before serving.
- Avoid direct heat – Keep chilled until serving to prevent softening.
- Use airtight wrap – Cover tightly with plastic wrap or foil to maintain freshness.
- Label before freezing – Note the date to keep track of storage time.
Reheating Tips for Easy No-Bake Chocolate Pudding Pie
- Not Applicable – This pie is served chilled. However, if frozen, allow it to thaw in the refrigerator for 1–2 hours before serving for a creamy texture.
Nutrition Value (Per Serving)
- Calories: 350 kcal
- Protein: 6 g
- Fat: 18 g
- Carbohydrates: 42 g
- Fiber: 2 g
- Sugar: 25 g
- Calcium: 150 mg
FAQs
How do you thicken chocolate pudding pie filling?
If the pudding filling isn’t thick enough, let it chill longer in the refrigerator—at least 3 to 4 hours. Using cold milk when mixing the instant pudding also helps it set properly. For a firmer texture, reduce the milk slightly or fold in extra whipped topping.
Can I make a no-bake chocolate pudding pie without instant pudding mix?
Yes, you can make a homemade version using cornstarch, cocoa powder, milk, sugar, and butter. Cook the mixture until thickened, let it cool, and then fold in whipped topping before pouring it into the crust. Chill until set for a smooth, rich pie.
Why is my chocolate pudding pie not setting?
Your pie might not set if too much milk was used or if it wasn’t chilled long enough. Stick to the recommended amount of milk on the pudding box and ensure it’s cold. Allow the pie to refrigerate for at least 3 hours, or overnight for best results.
How long does chocolate pudding pie last in the fridge?
Chocolate pudding pie lasts up to 4 days in the refrigerator when covered tightly with plastic wrap. Keep it chilled until serving to maintain its creamy texture and prevent the crust from softening.
Final Words
Easy No-Bake Chocolate Pudding Pie is a deliciously simple dessert that combines convenience with indulgence. With its rich, creamy chocolate filling and buttery crust, it’s a dessert that always delivers.
PrintNo-Bake Chocolate Pudding Pie
Easy No-Bake Chocolate Pudding Pie is a chilled dessert made from instant chocolate pudding combined with milk and whipped topping, poured into a pre-made graham cracker or Oreo crust. The pie is then chilled until set, resulting in a smooth, silky texture that melts in your mouth. It’s simple, quick, and irresistibly delicious — the perfect dessert for chocolate lovers.
- Prep Time: 10
- Total Time: 10 minutes
- Yield: 8 1x
- Category: Dessert
- Method: No-bake
- Cuisine: American
Ingredients
-
1 pre-made 9-inch graham cracker or Oreo pie crust
-
2 boxes (3.9 oz each) instant chocolate pudding mix
-
3 cups cold milk
-
1 cup whipped topping (such as Cool Whip), plus more for garnish
-
½ cup semi-sweet chocolate chips (optional for extra richness)
-
Chocolate shavings or cocoa powder (for topping)
Instructions
-
Prepare the filling – In a large bowl, whisk together chocolate pudding mix and cold milk for about 2 minutes until thickened.
-
Add whipped topping – Gently fold in 1 cup of whipped topping until smooth and creamy. If using chocolate chips, stir them in at this stage.
-
Fill the crust – Pour the chocolate pudding mixture into the pre-made pie crust and spread evenly with a spatula.
-
Chill the pie – Cover with plastic wrap and refrigerate for at least 3–4 hours or until fully set.
-
Add topping – Before serving, spread an extra layer of whipped topping over the pie and garnish with chocolate shavings or a dusting of cocoa powder.
-
Slice and serve – Use a sharp knife to cut clean slices and enjoy chilled.